The Steps for Laying New Sod
How to Lay Sod in Your Yard
Whether you’ve just built on new construction land or your property is simply in need of a new lawn, you may be considering your landscape design. In fact, your landscaping contractor may have suggested sod as your solution. Sod is a great way to get a beautiful lawn without the delays and long wait for grass seed germination. If you’ve decided that sod is the right solution, it’s important that you’re adequately prepared. While it is a great way to establish your lawn quickly, it does require careful installation and a few weeks of preparation first. Here are some things you should know about the process.
Know What You Need
The first step in the process of laying sod is knowing how much you need. Sod is typically sold by the square foot, so you’ll have to measure your yard to determine how much you will need to order. You can get a precise measurement with a measuring wheel. Simply walk the perimeter of your property to calculate your square footage. Alternatively, you could measure your stride and walk the length, then multiply your steps by your stride length. Do the same for the width of the yard and then multiply the two figures together for your area.
Choose Your Sod Style
Your landscaping contractor can help you choose the right sod style for your property. Not only do you need to select the grass type that you want, but you’ll also have to choose whether you want your sod in strips or slabs. In most cases, large rolls of strips are the easiest to work with. However, if you have some smaller spaces to fill in, you may want a few small slabs as well. Be prepared to trim the sod as needed for a perfect fit, but save the scraps to fill in any gaps at the end.
Prepare Your Soil for Sod Application
Soil preparation should start a few weeks before you plan to get your sod. This is important for proper sod establishment. Start by watering the soil and applying a broad-spectrum herbicide. Then, spread a thick layer of compost over the top of the soil and let it sit for at least a few weeks so that you eliminate any potential weed growth and the compost has time to break down and add some nutrients to the soil.
Have your landscaping contractor till the soil to work the compost in and turn up any rocks that may appear. Then, rake the soil and remove the rocks so that the sod can establish roots without any obstructions. Finally, test the soil pH and nutrient levels and amend it with fertilizer or other additives if necessary for the sod that you’ve chosen.
Apply the Sod Carefully for Proper Growth
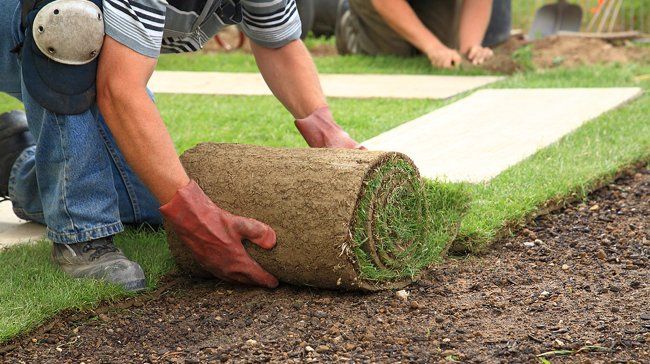
Once you’ve prepared the soil, choose a dry day to install the sod. Keep your sod rolls in the shade while you’re working so that they don’t dry out, and water each strip of soil lightly before you apply sod over the top of it.
Start at a straight edge in your lawn so that you can create straight lines with your sod strips. When possible, choose a right-angled corner to start in. Then, slowly unroll the sod over the soil. Press the sod down gently to remove air pockets and ensure that it is properly seated. Focus on getting each strip of sod straight and even, then smooth it out and pat it down. Water your sod right away after application.
Secure the Sod With the Help of Your Landscaping Contractor
Ask your landscaper about securing your sod with a roller once you’ve applied it. A roller will help to eliminate any air pockets and will ensure that the roots under the sod are in contact with the soil. This helps your sod fully establish so that it will thrive.
Water the Sod Regularly for the First Few Weeks
After the sod is installed, it needs consistent watering for the first couple of weeks to ensure that those roots establish a strong, deep connection in the soil. Water it daily for the first week, and avoid walking on it if at all possible for that full week. This gives the sod time to settle into place. After the first week passes, water it every couple of days. Don’t mow your sod until it’s fully established and is at least several inches high. Even then, only cut a small portion of the growth the first couple of times.
Making the transition from dirt to thriving, lush green grass takes some time, effort and care. With a landscaping contractor who is experienced in sod selection and application, you can create the lawn you’ve envisioned without struggling with grass seed, hay cover and battling the birds for the seed. Instead, you can have a thriving lawn in a matter of weeks when you choose sod and you know how to install it properly. If you would like more information about selecting and installing sod,
contact us at Canepa Landscaping today.
Share on Social
Other Posts You Might Enjoy